What Is a Dockerfile?

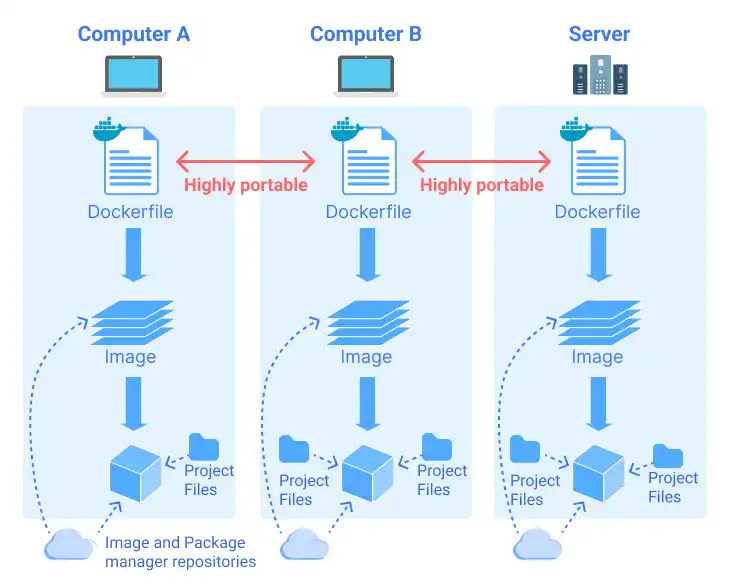
A Dockerfile is a text file containing a series of commands and instructions that define how to build and configure a Docker image. It serves as a blueprint, enabling developers to package applications, dependencies, and configurations into a portable and consistent format. Dockerfiles are fundamental in containerization, offering simplicity, efficiency, and repeatability for deploying applications across various environments.
In this section, we’ll cover the following topics:
- Introduction to Dockerfiles
- Comparison: Running a Container Without a Dockerfile vs. With a Dockerfile
- Case Studies: Writing and Running Dockerfiles
Introduction to Dockerfiles
What is a Dockerfile?
A Dockerfile is a simple text file that contains a list of instructions for creating a Docker image. Dockerfiles enable developers to streamline the containerization process by providing a clear and automated way to define application environments. They ensure consistency across development, testing, and production environments. Think of it as a "recipe" that tells Docker step-by-step how to prepare an environment where your application can run.
Benefits of Using Dockerfiles
Dockerfiles simplify container management by automating the creation of Docker images. They provide consistency, ensuring the same environment across development, testing, and production. Automation reduces manual setup, saving time and preventing errors. Version control allows tracking of environment changes within repositories. Dockerfiles are lightweight themselves, as they are simple text files that define how to build an image without adding overhead. They also help create optimized, lightweight images by minimizing unnecessary components. With portability, teams can share and deploy applications seamlessly.

Dockerfile Example
Here’s a Dockerfile example for a simple Python Flask app.
FROM python:3.9
WORKDIR /app
COPY requirements.txt ./
COPY . .
RUN pip install -r requirements.txt
EXPOSE 5000
CMD ["python", "app.py"]
- FROM python:3.9: This specifies the base image for the container.
- WORKDIR /app: This sets the working directory inside the container to /app.
- COPY requirements.txt ./: This copies the requirements.txt file from the host machine into the container’s working directory (/app).
- COPY . .: This copies all files and directories from the current folder on the host machine into the container’s working directory.
- RUN pip install -r requirements.txt: This installs all the Python dependencies listed in requirements.txt using pip.
- EXPOSE 5000: This declares that the container listens on port 5000.
- CMD ["python", "app.py"]: This sets the default command to run the application when the container starts. Here, it runs the Flask application defined in app.py using Python.
How To Use a Dockerfile
A Dockerfile is used to create a custom Docker image tailored to your application's needs. The docker build command generates the Docker image, but it’s important to ensure your project folder structure is organized correctly before running the command.
1. Project Folder Structure
Below is a simple example of a project structure with a Dockerfile:
project-folder/
├── app.py
├── requirements.txt
├── Dockerfile
Dockerfile: This file contains the step-by-step instructions to create a custom Docker image.
Note: The file must be namedDockerfileby default (case-sensitive). If you want to use a different name, you can specify it with the-fflag in the build command (e.g.,docker build -f MyDockerfile .).- Application Files: These are the main files of your project, such as
app.py(your application logic) and any configuration files. requirements.txt: This file lists all the dependencies your application needs, such as Flask. Docker uses it to install these libraries during the build process.
2. The Docker Build Command
Once your project structure is ready, you can use the docker build command to create a custom Docker image based on the Dockerfile.
Example Command:
docker build -t flask-app .
-t flask-app: This assigns a name (flask-app) to the Docker image for easy reference..: Specifies the build context, which is the current directory containing the Dockerfile and project files.
What Happens When You Run This Command:
- Docker reads the instructions in the Dockerfile.
- It creates a Docker image based on those instructions.
- The image is stored locally on your machine, ready to be used for running containers.
3. Using the Docker Image
After the image is built, you can use it just like an image pulled from Docker Hub. To run a container from the image, use the docker run command.
Example Command:
docker run -p 5000:5000 flask-app
-p 5000:5000: Maps port5000inside the container to port5000on your machine. This makes the app accessible athttp://localhost:5000.flask-app: Refers to the name of the image built in the previous step.
Comparison: Running a Container Without a Dockerfile vs. With a Dockerfile
When working with Docker, there are two main ways to set up and run a container: manually, without a Dockerfile, or automatically, using a Dockerfile. While it’s possible to manage containers without a Dockerfile, doing so often involves repetitive, error-prone steps, especially for complex applications. On the other hand, a Dockerfile streamlines the process, ensuring consistency and automation.
This comparison aims to highlight the differences between these two approaches using a simple Python Flask application as an example. Understanding this distinction helps clarify why Dockerfiles are critical for real-world projects, especially in collaborative or production environments.
Scenario: Running a Python Flask App:
app.py: A simple Flask app.requirements.txt: Lists dependencies (Flask).
1. Without a Dockerfile (Manual Setup)
To run a container without a Dockerfile, you perform each step manually:
Pull a Python base image:
docker pull python:3.9
Run a container and install dependencies:
docker run -it python:3.9 bash
pip install flask
Copy files from the host to the running container:
docker cp app.py <container-id>:/app/app.py
Start the Flask app:
python /app/app.py
Disadvantages:
- Manual Work: You must repeat these steps for every new container.
- No Reproducibility: If another developer needs to run the app, they have to follow the same steps manually, which is error-prone.
- No Version Control: There's no easy way to track changes to your setup process.
2. With a Dockerfile (Automated Setup)
Using a Dockerfile, the process is automated and repeatable.
Dockerfile:
FROM python:3.9
WORKDIR /app
COPY . .
RUN pip install -r requirements.txt
EXPOSE 5000
CMD ["python", "app.py"]
Steps:
Build the image:
docker build -t flask-app .
Run a container:
docker run -p 5000:5000 flask-app
Advantages:
- Automation: All steps (installing dependencies, copying files, etc.) are written in the Dockerfile, so they happen automatically.
- Reproducibility: Anyone can build and run the same container using the Dockerfile.
- Version Control: The Dockerfile can be stored in your repository, allowing easy updates and collaboration.
Comparison Summary
|
Aspect |
Without Dockerfile |
With Dockerfile |
|
Setup Process |
Manual (run commands interactively). |
Automated (defined in the Dockerfile). |
|
Reproducibility |
Prone to errors, varies by person. |
Fully reproducible and consistent. |
|
Collaboration |
Difficult to share setup steps. |
Easy to share via Dockerfile. |
|
Build Time |
Requires interactive setup for each container. |
Single build command automates everything. |
|
Best for Beginners? |
OK for learning basic Docker concepts. |
Better for real-world projects. |
- Without a Dockerfile: Suitable for quick experiments or understanding Docker basics. However, it's not practical for real-world projects due to the manual and error-prone process.
- With a Dockerfile: The best approach for automation, reproducibility, and collaboration, especially when working with teams or deploying applications.
Case Studies: Writing and Running Dockerfiles
n this section, you’ll learn how to write and run Dockerfiles for various real-world scenarios. Each case study is designed to help you understand key concepts such as defining application environments, automating setups, and running containers efficiently. To keep everything organized, we’ll start by creating a main project folder (ch5-dockerfile-demo) and individual subfolders for each example. By the end, you’ll have hands-on experience with Dockerfile creation, project structure management, and containerization workflows.
0. Create Main Project Folder
First, create a base folder (ch5-dockerfile-demo) to organize all your projects. Inside this folder, you’ll create subfolders for each case study.
mkdir dockerfile-demo
cd dockerfile-demo
1. Static Website with NGINX
Folder and File Setup:
We create a dedicated project folder for the static website and initialize essential files (Dockerfile and index.html). This setup prepares the necessary structure for our containerized website.
mkdir static-website
cd static-website
touch Dockerfile index.html
Project Folder Structure:
This illustrates the directory layout, showing how files should be organized within the main project folder.
dockerfile-demo/
└── static-website/
    ├── Dockerfile
    ├── index.html
index.html
This is the core webpage content. It includes basic HTML to display a simple message when accessed through the NGINX web server.
<!DOCTYPE html>
<html>
<head>
    <title>My Static Website</title>
</head>
<body>
    <h1>Hello, Docker with NGINX!</h1>
</body>
</html>
Dockerfile
Defines how the static website will be served using NGINX. It instructs Docker to use the lightweight nginx:alpine image and copy the index.html file to the correct directory inside the container.
FROM nginx:alpine
COPY index.html /usr/share/nginx/html
Build and Run
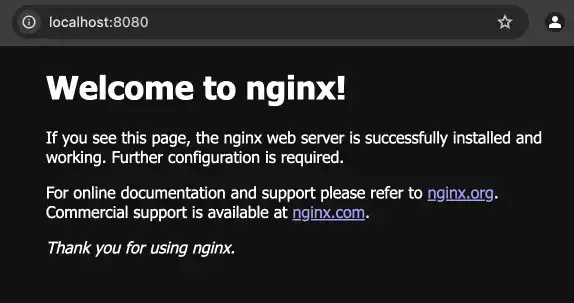
This step compiles the project into a Docker image (static-site) and starts a container from it. Mapping port 8080 to 80 allows us to access the website on http://localhost:8080.
docker build -t static-site .
docker run -d -p 8080:80 static-site
Visit http://localhost:8080 to view your site.

2. Python Application with Flask
Go Back to the Main Folder:
Before creating a new project, we return to the main project directory to maintain an organized folder structure.
cd ..
Folder and File Setup:
We create a subfolder for the Flask application and initialize essential files:
Dockerfile: Defines how to containerize the Flask app.app.py: The main application file containing Flask routes.requirements.txt: Lists dependencies required for the app.
mkdir flask-app
cd flask-app
touch Dockerfile app.py requirements.txt
Project Folder Structure:
A well-structured project folder ensures all necessary files are properly placed, making the application easy to manage and containerize.
dockerfile-demo/
└── flask-app/
    ├── Dockerfile
    ├── app.py
    ├── requirements.txt
app.py
This is the core Python script for the Flask web application. It defines a simple route (/) that returns a greeting when accessed.
from flask import Flask
app = Flask(__name__)

@app.route('/')
def home():
    return "Hello, Docker!"

if __name__ == '__main__':
    app.run(host='0.0.0.0', port=5000)
requirements.txt
Lists Python dependencies. Here, it only includes Flask, which is necessary to run the web app.
flask
Dockerfile
Specifies the instructions for building the Flask container. It starts from a lightweight Python image, installs dependencies, copies the application files, and sets the default command to start the app.
FROM python:3.9-slim
WORKDIR /app
COPY requirements.txt .
RUN pip install -r requirements.txt
COPY . .
CMD ["python", "app.py"]
Build and Run:
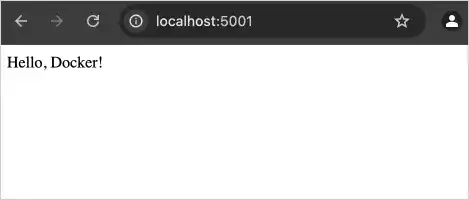
We build the Docker image (flask-app) and run a container from it, mapping host port 5001 to the container’s port 5000 to make it accessible.
docker build -t flask-app .
docker run -d -p 5001:5000 flask-app
Visit http://localhost:5001 to see your Flask app.

3. Node.js Application
Go Back to the Main Folder:
Before starting the next project, we navigate back to the main project directory to keep files well-organized.
cd ..
Folder and File Setup:
We create a subfolder for the Node.js application and initialize the required files:
Dockerfile: Defines the container setup.server.js: The main Node.js server script.package.json: Specifies application metadata and dependencies.
mkdir node-app
cd node-app
touch Dockerfile server.js package.json
Project Folder Structure:
Organizing files correctly helps streamline development and containerization.
dockerfile-demo/
└── node-app/
    ├── Dockerfile
    ├── server.js
    ├── package.json
server.js:
This is the Node.js script that creates an HTTP server responding with "Hello, Docker!" when accessed.
const http = require('http');
const server = http.createServer((req, res) => {
    res.end('Hello, Docker!');
});
server.listen(3000);
package.json:
Defines metadata for the Node.js application, including dependencies. Here, it is empty since no external packages are required.
{
  "name": "node-docker-app",
  "version": "1.0.0",
  "main": "server.js",
  "dependencies": {}
}
Dockerfile:
Specifies the container setup, using a Node.js base image, setting a working directory, copying files, installing dependencies, and defining the start command.
FROM node:16
WORKDIR /app
COPY . .
RUN npm install
CMD ["node", "server.js"]
Build and Run:
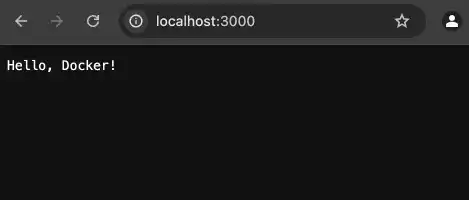
We build the Docker image (node-app) and run a container, mapping port 3000 from the container to the host.
docker build -t node-app .
docker run -d -p 3000:3000 node-app
Visit http://localhost:3000 to access your Node.js app.

FAQ: Understanding Dockerfiles
What is a Dockerfile?
A Dockerfile is a text file containing a series of commands and instructions that define how to build and configure a Docker image. It acts as a blueprint for packaging applications, dependencies, and configurations into a portable format.
What are the benefits of using Dockerfiles?
Dockerfiles simplify container management by automating image creation, ensuring consistency across environments, reducing manual setup, and allowing version control. They help create optimized, lightweight images and facilitate seamless application sharing and deployment.
How do you use a Dockerfile?
To use a Dockerfile, organize your project folder structure, then run the `docker build` command to create a custom Docker image. This image can be used to run containers with the `docker run` command.
What is the difference between running a container with and without a Dockerfile?
Running a container without a Dockerfile involves manual, error-prone steps, while using a Dockerfile automates the process, ensuring consistency and reproducibility. Dockerfiles are ideal for real-world projects and collaboration.
Can you provide an example of a Dockerfile use case?
One use case is containerizing a Python Flask application. A Dockerfile can automate the setup by specifying the base image, copying application files, installing dependencies, and defining the command to run the app.